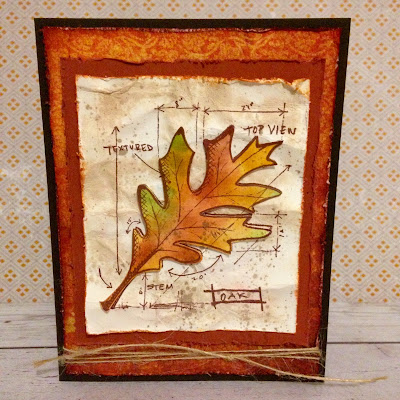
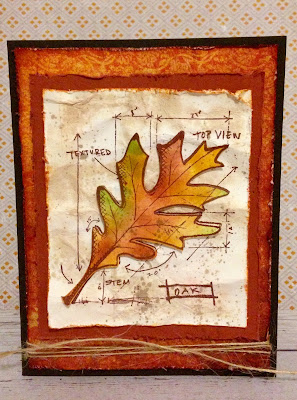
I spent a wonderful weekend stamping with my Mother making lovely handmade fall cards. This card was inspired by THIS pin, using the Tim Holtz Tattered Leaves stamps.
We wanted to take it down a notch and make a simpler version. We used Distress inks to color the leaf. The twine ribbon is from Hobby Lobby and cost a dollar - love it! Comes in several great colors. Love that it is so thin.
We distressed and inked and scrunched and layered! All in all, we were happy with our card. I forgot to bring my embossing folder so we went in a different direction with the background and used this beautiful BoBunny paper. It is so Autumn!
I'm linking up to Work it Wednesday for their fall challenge HERE. Thanks for visiting!
Aug 31, 2015
Viva la Verve August 2015 Week 4 Handmade Birthday Card
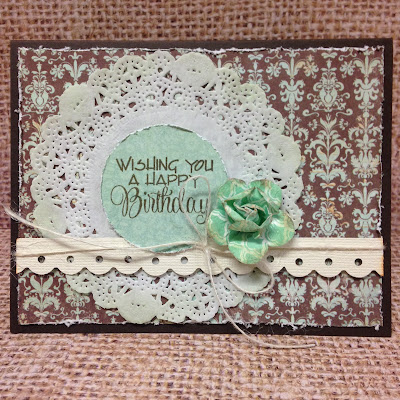
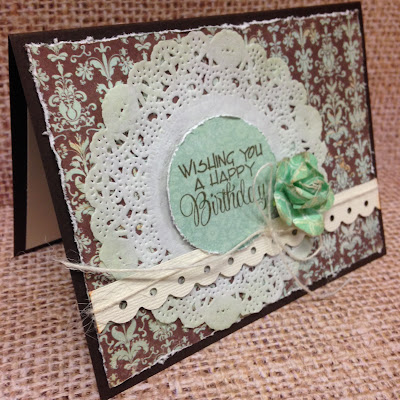
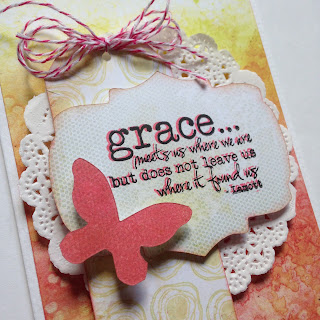
I'm finishing up August with a final birthday card using this sketch using this beautiful Verve stamp. I stamped it in Walnut Stain Distress ink and layered over a doily.
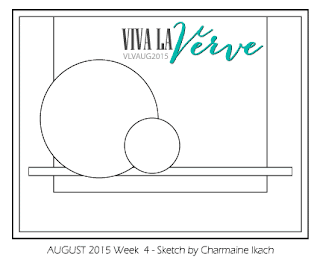
Aqua and brown are one of my favorite color combos! I just loved this paper. I'm linking up to the VLV August Challenge HERE.
Aug 28, 2015
Be Glorified Oh God Journal Page
This journal page was preconceived, the idea just came to me, which is unusual for me because I usually just sit down with no concept of what I will do and just pour paint directly onto my page without any rhyme or reason. But I had an idea for this bright green page with all of this growth pouring out in a cluster and this is what I came up with in the process.
I painted the green and added some white and hellow highlights and lettering in with a black sharpie. I added some stamping and mod podged a group of leafy die cuts below the hand drawn scallops. I wanted the bottom half to be softer, so I dry brushed some gesso over it. I added very little journaling to this page, just wanted to illustrate the point. I really love this 7Gypsies arrow stamp and used it here with the idea that no matter what, I want to lift God up. Even when it is hardest, I want to glorify Him in my actions.
My daughter took this amazing photo while we were on a boat at Table Rock, SC. "The heavens declare the glory of God; and the firmament shows His handiwork. Day unto day utters speech, and night unto night reveals knowledge. There is no speech nor language where their voice is not heard. Their line has gone out through all the earth, and their words to the end of the world." The earth literally reveals God's glory, we are compelled to join and declare His mighty works.
Thanks for visiting today, take a moment today and absorb the beauty surrounding you. I'm linking up to Simon Says Anything Goes HERE and Balzer Designs Journal Every Day HERE.
Aug 27, 2015
Think on These Things Mixed Media Journal Page
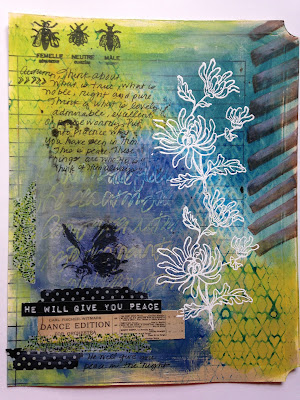
My Take Me Deeper journal page for August week 3, focused on Philippians 4:4-9, "Finally, brothers and sisters, whatever is true, whatever is noble, whatever is right, whatever is pure, whatever is lovely, whatever is admirable - if anything is excellent or praiseworthy - think about such things. Whatever you have learned or received or heard from me, or seen in me - put it into practice. And the God of peace will be with you.”
I never quite understood how to train my mind to stay focused on these things, it wanders! But Mary Brack shared a very insightful devotion on why thinking these things helps guard our minds from thoughts that destroy. The end of the verse promises that the God of peace will be with you if you as your thoughts are aligned with these good things. Mary shared that the path to cultivating such thoughts begins with thankfulness. Recognizing God's work in and around us helps us to stay focused on the real truth, and as we give God credit for His work, He fills our hearts and minds with peace - WOW! Today's verse over at Bible Gateway is "You will keep him in perfect peace, whose mind is stayed on You, because he trusts in You." Isaiah 26:3 Man, did this ever hit home with me, during such a rough week! Thank you, Mary! My Grandma always said, "Count your blessings every day and all your troubles will fly away." I practiced thanksgiving this week to help me get out of a slump, and it has! PTL!
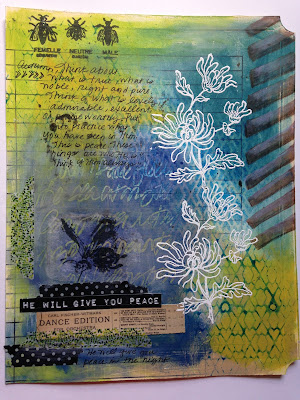
For my journal page, I used some layered stencils, including some DIY stencils I cut from file folders. I've been playing around with finger painting a lot lately. I scribed into the wet paint layers here. The bee stamp is by Stampers Anonymous. The white flower is embossed and by Penny Black. It really changed up the texture on the flat paint.
I'm linking up to Take Me Deeper, A Vintage Journey for their Things With Wings Challenge, Craft Stamper UK for their Pencils and Pens Challenge, WOW! Embossing Powder for their monthly Embossing Challenge, and Penny Black for their Summer Flowers challenge. Thanks for looking! I challenge you to put the practice of thanksgiving to the test today. <3
I never quite understood how to train my mind to stay focused on these things, it wanders! But Mary Brack shared a very insightful devotion on why thinking these things helps guard our minds from thoughts that destroy. The end of the verse promises that the God of peace will be with you if you as your thoughts are aligned with these good things. Mary shared that the path to cultivating such thoughts begins with thankfulness. Recognizing God's work in and around us helps us to stay focused on the real truth, and as we give God credit for His work, He fills our hearts and minds with peace - WOW! Today's verse over at Bible Gateway is "You will keep him in perfect peace, whose mind is stayed on You, because he trusts in You." Isaiah 26:3 Man, did this ever hit home with me, during such a rough week! Thank you, Mary! My Grandma always said, "Count your blessings every day and all your troubles will fly away." I practiced thanksgiving this week to help me get out of a slump, and it has! PTL!
For my journal page, I used some layered stencils, including some DIY stencils I cut from file folders. I've been playing around with finger painting a lot lately. I scribed into the wet paint layers here. The bee stamp is by Stampers Anonymous. The white flower is embossed and by Penny Black. It really changed up the texture on the flat paint.
This is one of my favorite pages so far. I stamped the butterfly by Penny Black onto tissue paper and mod podged it to the page, so I could get a clean stamped image. I love adding strips of washi tape to my pages... You can see I also sanded some of the paint in a crosshatch pattern.
Here is a look at the pile of completed pages from this year. All are front and back. Slow, but steady progress. Gives me plenty of time to decide on my binding method.I'm linking up to Take Me Deeper, A Vintage Journey for their Things With Wings Challenge, Craft Stamper UK for their Pencils and Pens Challenge, WOW! Embossing Powder for their monthly Embossing Challenge, and Penny Black for their Summer Flowers challenge. Thanks for looking! I challenge you to put the practice of thanksgiving to the test today. <3
Aug 26, 2015
Happy Birthday Stamped Card with SU Stamps and Paper Flowers
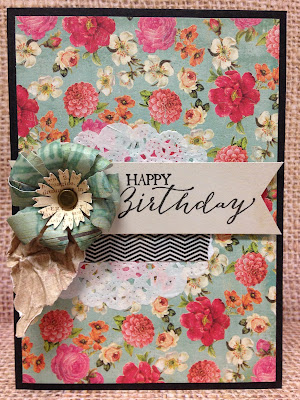
I have been wanting to make a Cardabilities sketch card for a while, and finally took the plunge and made this Stampin' Up! happy birthday card. These sketches always have tons of flowers incorporated, so after making all those DIY paper flowers for the tutorial I posted HERE, I decided I was ready to whip out one of these designs!

This is a double layered flower using the skinny petaled die from the Tattered Florals die. I layered with some SU! stamping, a strip of the end paper, and a deconstructed doily.
I finished it off with a Tattered Leaf and mounted to a black card. I really liked the black as a background, made this such a moody card. I resisted the urge to distress these papers, and am glad I did. I like the modern look with this shabby paper.
I'm linking up to the Cardabilities lineup #129 HERE.
Aug 25, 2015
Unity August Be Inspired Stamped Thank You Card
My first fall card of the year here, made for the Unity Be Inspired August challenge. Unity decided to go heavy on the fall theme and chose plaids, oranges and teal for the color scheme, along with a great card sketch. I used both for my project.
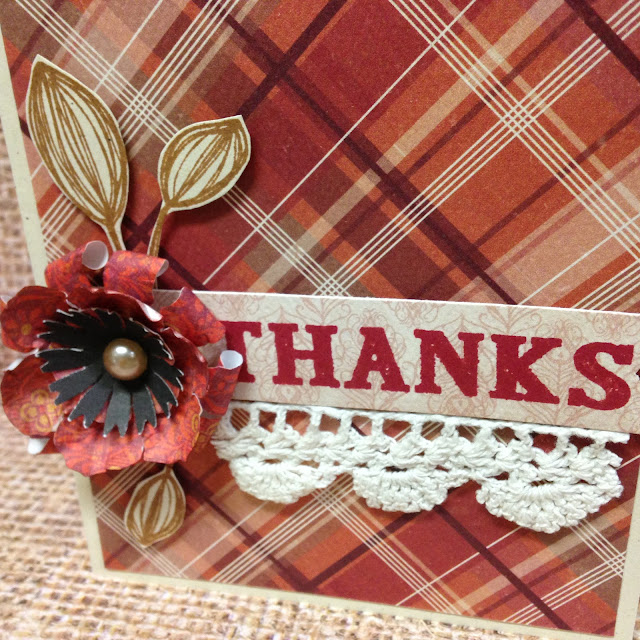
Remember my post on making your own DIY paper flower embellishments HERE? Well three of these lovelies found their way onto my Unity thank you cards. HOW FUN!!! I used my favorite Authentique plaid paper and some crocheted trim. The leaves are from THIS cool stamp, Lean Pretty Please by Unity. I just cut them out and added them in a completely different way than they are on the stamp, but isn't that the fun?!
Now the best part of this is that I recently won these 25 stamps from commenting on a Unity blog hop! Woot woot! Go Autumn! Anyway, one of the stamps was this amazing Thanks stamp and I was able to complete the fall theme on my cards with it. YAY! I used Adirondack cranberry ink for the Thanks and Archival sepia for the leaves.
Anytime I use scrapbook paper to make a standard sized card, I try to make 3 of them, so here they are! I just happened to have made three of these DIY paper flowers - perfect!
I'm entering the Unity link up HERE. Now I know just yesterday I posted a sunny summer card and went on and on about how I don't want to see summer go, but hey my name is Autumn so forgive me. ;0 Try to understand my mixed feelings... TFL!
You are invited to the Inlinkz link party!
Click here to enterViva la Verve Feature & a Second August 2015 Week 3 Verve Card
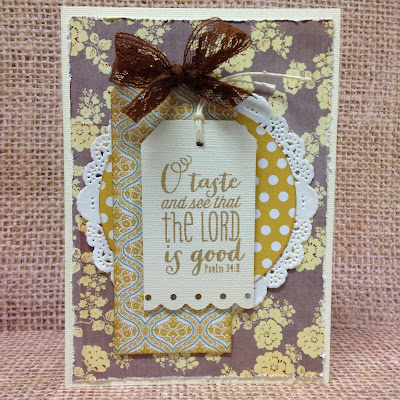
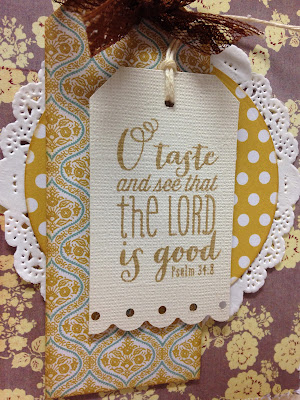
I was so excited about this week's Viva la Verve sketch that I ended up making two cards! I mean, what a pretty layout! I used the "Taste and See" stamp and Tree Branch Archival ink by Wendy Vecche. This and Fossilized Amber Distress ink are my two favorite pads right now! I sponged FA along the edge of the second tag and the dotty circle.
 I used a Fiscars punch along the bottom of the mini tag and a SU! doily and circle nestabilities die for the layers.
Some simple distressing and matting onto a natural card and there you have it. And guess what!!! Julee featured my first card for this sketch on her recap post HERE. I'm thrilled!!! I am working hard at these challenges in hopes of winning the $100 prize of Verve stamps. Oh how I need them...!!!
I'm linking up to the VLV August Week 3 Challenge HERE. Cross your fingers and toes for me! ;0
Aug 24, 2015
Tips and Tricks for Making DIY Paper Flowers Using Stuff You Have
I am truly thrilled to share this tutorial on DIY paper flowers with you. The best part of this tutorial
is that you can use things you already have on hand for these techniques! You can purchase loads of fancy flower making products, but there are many things already in your home that can easily create the same effects. To start you need some simple flower shapes cut from scrap printed cardstock. I used the Tattered Florals die for most of these, but you could easily cut out flowers freehand if you don't have a die cutting machine. The starburst in the middle is a McGill punch, and would also be pretty easy to cut by hand.
Mist the cut flowers with water on both sides as you begin to shape your petals. I used the rounded end of my Uniball ink pen over a firm, but thick mouse pad and pushed into each petal to create this curved upward effect. Use a wooden skewer or thin paintbrush handle to curl the center petals as desired. Let each layer dry. They will harden as they dry and the shape will remain. Glue the stacks together with Aleene's tacky glue. I put my glue upside down in a heavy drinking glass so the glue would come out easily and quickly. After your glue has set you can either add pearl bling or a brad to the center of your flower.
These are made with a Brenda Walton Sizzex die using the DIY Gessoed Flower Tutorial I posted HERE. I found out that you don't have to use the gesso and paint or ink over the flowers. They will harden just from the water and crinkling. I like the variation created on these without having used the gesso. I particularly like scrunching up the center layers a lot so that the brad doesn't show. Then you can use really cheap brads and they don't even have to match.
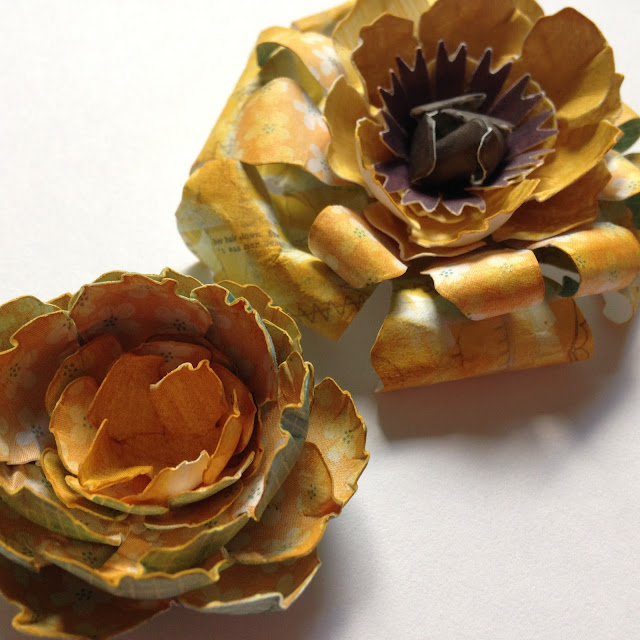
This big brown flower is my favorite, the solid kraft flower my second fav! To create the layers in the big brown flower, I curled the petals of the die with the skinny petals down. It really created great dimension! The leaf is another Tim Holtz set, all leaves. The kraft flower has 7 layers of the same sized flower, with each layer curled up more and more. The center is almost completely closed. I curled them tightly and glued them in place.
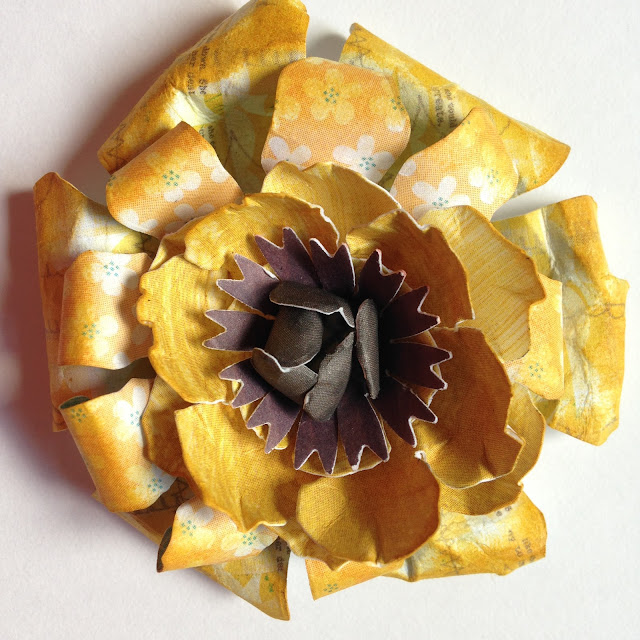
This big yellow flower has two layers of the skinny petal die curled under. The brown center is one small flower curled in heavily using the paintbrush rolling method. I sponge my flowers with ink after they have dried. I think this gives greater variation of color. I like the lighter areas. Here I used Fossilized Amber Distress Ink.
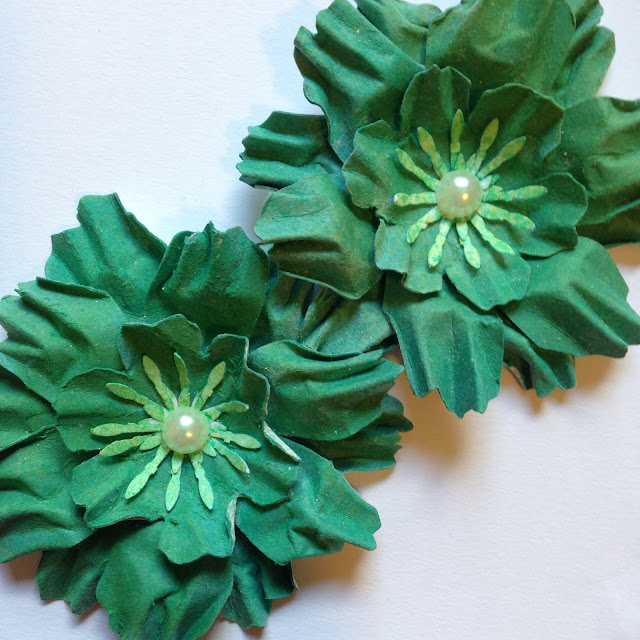
These green flowers were created by spritzing my cardstock heavily with water, and then accordion folding each petal. I used a Stampin' Up snowflake punch, which my good friend Carol gave me because she had 2, for the center. Thanks Carol! I punched two snowflakes and cut the sides off where it V'ed out. Then layered them together to make the "starburst." Lastly I spritzed with ink.
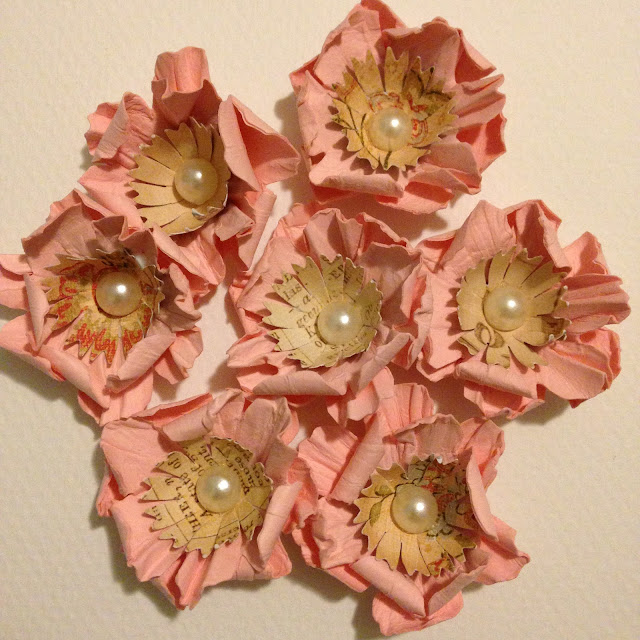
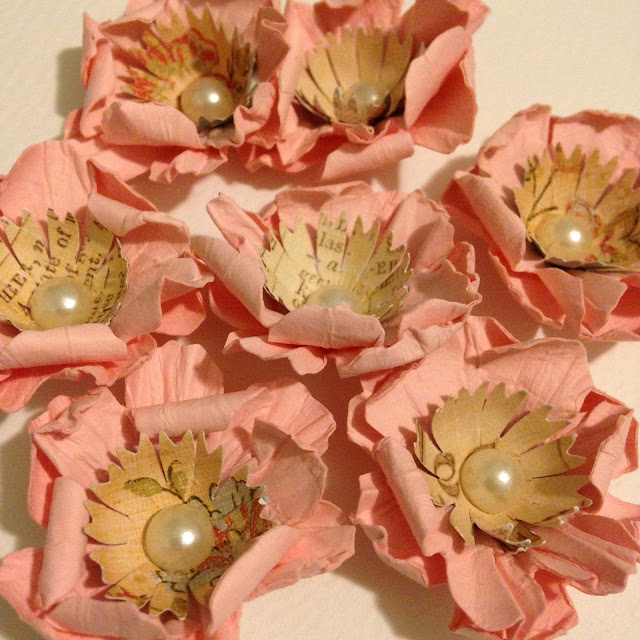
The last set of flowers was made putting a paintbrush in the center then scrunching all of the side petals around the brush, which looks like a closed umbrella. I opened and closed the petals three times to create all the nice wrinkles. Then I curled up random edges of the petals for dimension. These flowers only have two layers of the big flower and the center starburst. They look much more dimensional though. I recommend making this style of flower if you have very little of a particular patterned paper and want to coordinate it with your project.
As I create my projects, I can spritz or sponge different colors of ink onto the flowers so they coordinate perfectly. The pink flowers could easily be turned red or purple. One last trick I will share with you is on adhering the flowers to your projects. If you use the pearl bling stickers, do attach them with Glue Dots permanent glue "boogers." You know, that gummy stuff that advertisers use to send you things in the mail like a key stuck to a postcard saying, "You could win a new car!" Yes use that stuff! They sell it by the roll at Joann's. It is perfect for attaching your embellishments inside the flower and for attaching the flower to your project. I cut my 1/2" circles into 1/4ths for attaching the pearls. One package of this goes a long way, especially if you cut it down to size. And it is much easier to use than a glue gun.
Now pardon this rather long post, but this flower tutorial is my gift to YOU and the lovely ladies over at Freshly Made Sketches to celebrate their 200th Post!!! WOO HOO! I've also made this card for the celebration using one of my newly made DIY paper flowers!
I just couldn't resist adding this beautiful sentiment from Word Art Wednesday in there too!
Summer is sadly winding down and I want to squeeze in as much sun as possible. This yellow card of hope sure helps! I inked the sentiment with Fossilized Amber Distress Ink. Man, I sure do love that color! Don't forget to follow my Embellishment Pinterest board HERE.
I'm linking up to the Freshly Made Sketches 200th Post Celebration HERE and to Word Art Wednesday #197 HERE. In just a few weeks WWW will be having its 200th post... WOO HOO! The fun never stops. Head on over and show some love. Leave me a comment linking to your own DIY flowers too! TFL!
You are invited to the Inlinkz link party!
Click here to enterAug 23, 2015
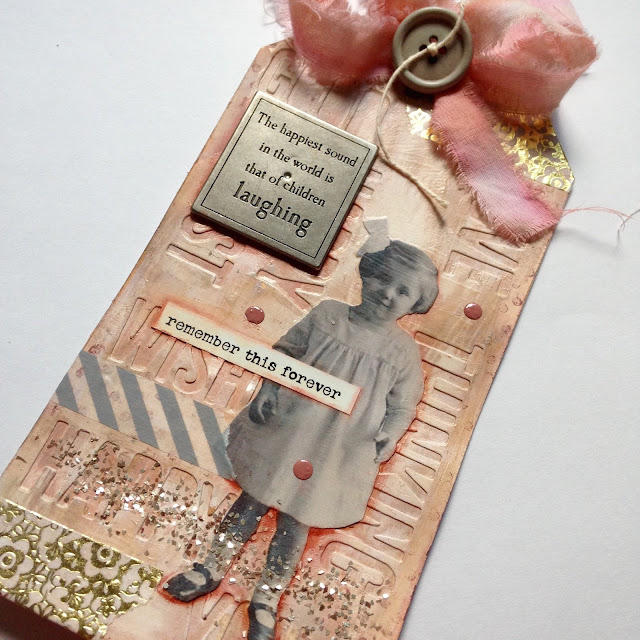
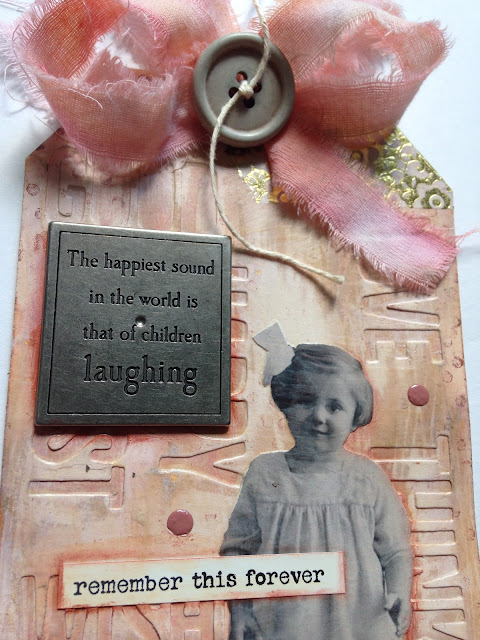
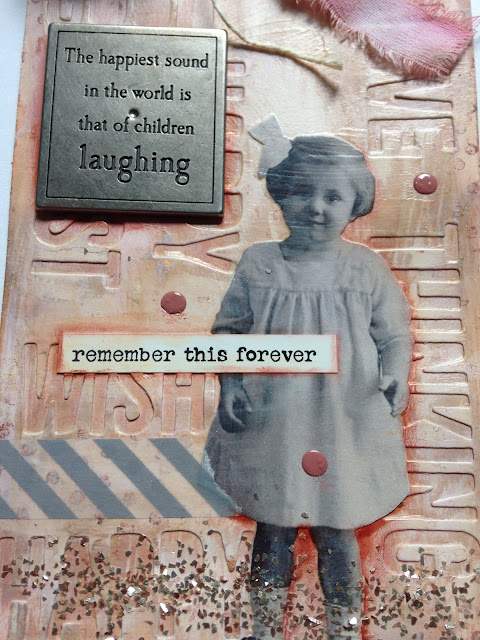
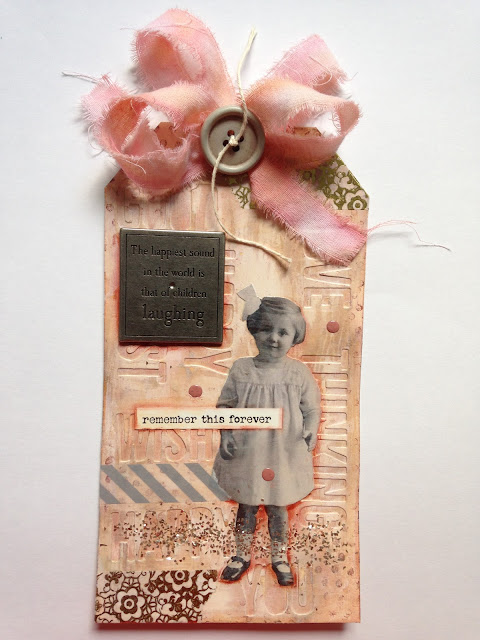
Tim Holtz August 2015 Tag
Cannot believe August is flying by, but found some time to make my August 2015 Tim Holtz tag this weekend. I printed this little girl image from THIS pin. I don't know what's gotten into me lately with the pink art, it's normally not me. But I decided that a rustic pink background would be a great way to frame her.
I usually NEVER have any of the products that Tim uses, but I actually had these sentiment dies and decided this would be a good time to use them. I glued the cut tag over some pink Authentique paper with a glue stick, not gluing where the actual cut outs were so it didn't gunk up.
I added Worn Lipstick, Victorial Velvet, and Vintage Photos to the panel after I had dry brushed the gesso over. It created a very pretty resist effect!
The letters weren't adhered so well, so after the background was complete I brushed the whole thing with mod podge and then adhered the girl to it. I sprinkled some vintage chunky glitter across and layered some washi tape. The metal piece was a brad by Making Memories that I've had for ten years. When I used my Crop-a Dile to attach it, it left a circular indention. BOO! :( But I really liked this tag despite it... The sentiment is a sticker by Heidi Swapp and I brushed Memories brown permanent ink with a paint brush around it and the girl for shadowing.
I added some DIY tattered and torn ribbon, tutorial HERE, and tied a button on with twine. I decided to make some little enamel dots with nail polish. It worked! COOL! I love how they coordinated. I also love the metallic accents. I'm linking up to House of Cards for their August Metallics Challenge HERE and to Tim's August lineup HERE. Thanks for looking!
Update: I am so excited that Tim has announced my tag as one of the winners of the August linkup HERE. Thank you all for your kind comments and visits.
You are invited to the Inlinkz link party!
Click here to enter
Subscribe to:
Posts (Atom)
Popular Posts
-
Hello friends! Today I have a freebie for you, one I am very excited about! I have had this on my to do list for ages and finally create...
-
Hi friends! Thanks for stopping by today for the Topflight Stamps 7th birthday. To celebrate, I’ve teamed up with some great designers to...
-
I am so pleased to have shared 2017 with my amazing blog buddies! I truly appreciate the support and comments from each of you. I'v...

