Nov 29, 2016

Tim Holtz November 12 Tags of 2016


I couldn't get away from the rub-on resist and my "lemonade" tag.  LOL!  So I gave her another dip.  I tore off the "es" in "wishes" for my die cut word to go with the rub-ons better.  I layered metallic bronze cardstock over black and went back with a white Distress Crayon to mimic the white around the rub-ons.


This time I used a variety of neutral Distress Inks for the background and added Fired Brick for the butterfly.


During our girls weekend I stamped some of these fab Tim Holtz butterflies with my friend Bonnie's stamp.  I cheated and "strategically" dipped it in my choice inks rather than coloring.  Seriously, I'm not a colorista!  LOL!  Can butterflies be festive?  Well I tried to make this into a holiday tag, not sure if that translates.


To add to the festive feel I was going for, I applied IndigoBlu FlitterGlu around the edge of my tag and then foiled with Tim's bronze foil.


I'm sharing with:

Nov 28, 2016

Ombre Embossing with Darkroom Door Border Stamps Tutorial


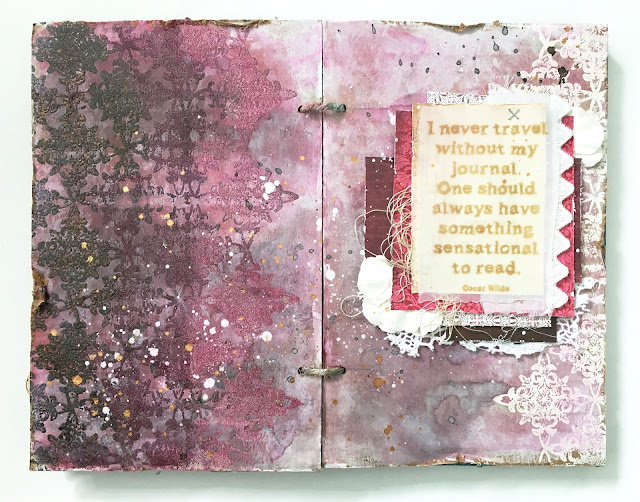
I'm sharing my final guest post this month on the Darkroom Door blog today.  I've created a spread in my junk journal featuring the new Star Border Stamp.  It is an exquisite stamp at 12" long!  The pattern lines up for a repeat, which is just so much fun to do!


I hope you will enjoy the process video I created for you, where I share ombre embossing for a variegated result.  Fun!  I'd love for you to hop on over to the Darkroom Door blog to see all of the details and let them know if you enjoyed my project.  Thanks sweeties!


Nov 27, 2016

Tim Holtz November 2016 Tag


Y'all know that since I've only been blogging about a year and a half now that I'm new to Tim's tag challenges, well relatively new.  Somehow I have never EVER seen the rub-on resist technique before.  And it is so so cool!!!


If I could go back in time I would do two things today.  One would be to have tried this technique when it was first introduced!  Duh!  And the second would be NOT to dip this gorgeous background in gesso.  Not to turn it pink, then NOT to dip the pink background in Vintage Photo to cover up the pink.  But, I can't.  I had to make lemonade with this one.


I am NOT a colorista, sadly.  I'm just not, so I used this sweet image from my new pack of Tim's cabinet cards.  I added a 7Dots sticker and a Tim "smile" die to it.


The very very dark background really showed the resist well, which I do like.


I picked up the tiny wood stars recently and thought they were the perfect texture accent.  And there you have it, my total "failure" of a take on Tim's beautiful fall remix....  LOL!


I'm sharing with:
You are invited to the Inlinkz link party!
Click here to enter

Nov 26, 2016

Great Joy Treeline and Knit Christmas Card


I am just loving the color combo Linda is throwing our way in her 12 Tags of Christmas challenge, sponsored by the Funkie Junkie Boutique.  This card is no exception!  I loved everything about Linda's tag, and recreated it almost identically.  This was a fun and quick project, so I hope you'll give it a try!


Since I have the Alterations On the Edge version of the treeline and not the thinlet, I just cut along the bottom to mimic that die.  I carefully lined up my stencil so that I could extend the pattern across my card base.


Have you been loving my jingle bells?  I got them at the Dollar Tree in red, gold, and silver!  What fun!  This is an oldie but goodie stamp that my mom and I have used countless times over the years, but I thought it was perfect for this particular card design.  I embossed it in white.  I used a cosmetic sponge to dab gesso around my die and around the edges of my card base.  I really loved how Linda used the holiday greens in white behind the bow.


Click HERE to see all of my 12 Tags of Christmas.  

Find the products I used at the Funkie Junkie Boutique today.  Enter this challenge to win a gift card!


I'm sharing with:

Nov 23, 2016

Shabby Chic Get Well Die Card


I have a super shabby get well card to share today, inspired by my dear friend Lisa of A Mermaid's Crafts.  Lisa is the die cut queen and her love for shabby chic inspired me to make this card.  Lisa, thanks for all of your continued inspiration and friendship.  Check out the details of how I made this card over at the Tutti Designs blog.  Thanks for your visit!

Purchase your Swirly Get Well Die today!

I'm sharing with:
Simon Says Stamp: Trio-Tastic (I used three purchased flowers)

Nov 22, 2016

DIY Embossing Diffuser


What do you get when you see Tim Holtz on Facebook live AND new Simon Says Stamp toys in the mail at the same time?!  Invention Convention, I tell you!  I absolutely love the idea of using embossing folders, but they never end up in my projects.  I have about fifteen patterns and rarely use a one.  Then Tim showed how to use the diffusers in his Sizzix Facebook takeover.  (See the Sizzix FB page if you missed it.)  Basically, the diffuser is a top plate for your cutting machine sandwich.  It applies pressure everywhere except the cutout part of the plate.  I just loved the circle one and wreath idea, especially when Tim showed simple punched wreath cards.  And with punches being the second most unused craft supply in my stash, I thought it high time to get these products out for play!

A diffusing plate should be at least as big as your embossing folder.  First I cut a sheet of white cardstock to size.  I carefully measured and aligned my circle die in place and then taped to secure.  I cut through and removed the circle, but left the outer portion to use as a template.  Next. I aligned my template with the same sized sheets of thin cardboard and cut several of these one by one.  I secured layer by layer until they were as thick as my cutting plate.  Then gave it a test and it wasn't thick enough, so I added one more sheet of chipboard.  I used Aileen's tacky glue and it worked great.  Run your sandwich through your machine using the DIY diffuser in place of your top cutting plate.  I saved the white template to use to mask my stamping, as seen in the card below.


The benefits of using a diffuser I've seen so far are 1. the stamping aspect and 2. the use of negative space to make your focal element pop and not compete with the embossed design and 3. the outline is perfect for helping place your wreath elements.


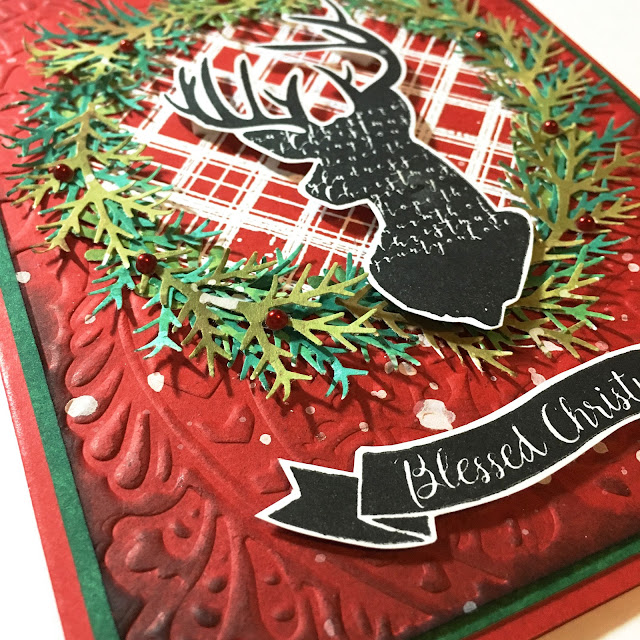
I used clear Aileen's tacky glue to attach my punched elements for the wreath.  I used the white tacky glue to adhere my layers of chipboard together for the DIY diffuser.  For my deer card, I used a Basic Grey Sizzix embossing folder and sponged it with black ink to add to the rustic effect.  Splashes of gesso help mix it up and look a bit like snow.  The little berries are tiny pearl stickers.


My husband was in love with the polar bear in this set, so I decided to try another version.  I used metallic kraft core paper and layered with the new Tim Holtz snowflake thinlet set.  I embossed the bear in gold and added various bling.  


I adhered sequins too and splashed with my trusty Goldfinger metallic paint by IndigoBlu.  If you look carefully, you can see the gold thread I added in a circular shape.  Fun!


I could not stop!  I mean seriously...  I made a fourth card but you'll have to wait for the Coffee Lovers Blog Hop to see it.  See the link in my sidebar.  The last card was made with a dotty folder.  I rubbed my Versamark pad over the raised areas and embossed with white EP.  I did a reverse of the punches for a different effect.  I punched out the red "berries" using my trusty Cropadile and then glued them down and added Stickles over them for shine.  More sequins and string.  


I truly hope you've enjoyed seeing these as much as I enjoyed making them.  


Don't forget to pin the graphic for reference.  

I'm sharing with:

You are invited to the Inlinkz link party!

Click here to enter

Nov 21, 2016

Tim Holtz Reindeer and Snowflake Die Winter Card


Can you believe we are 2/3 of the way through the 12 Tags of Christmas with The Funkie Junkie already!?  When I saw Linda's week 7 tag I squealed in glee!  I adore a blue, silver and white winter card palette.  For this card, I just sat down to play with no end result in mind.  I started by making my Distress Ink background with Chipped Sapphire and Black Soot.


I had made a large sheet of aluminum foil adhered to cardstock for Tim's October tag and used the remainder to cut snowflakes from his new Paper Snowflakes thinlet set.  I layered two together for dimension.  Man, I'm in love with these, especially foiled!!!  I needed some filler so I embossed the snowflake from the Scribble Woodlands set using ultra thick silver embossing powder.


I decided the Prancing Deer die would make a suitable replacement since I don't have the wonderful die Linda used.  I covered him with IndigoBlu's Slap It On mixed with Distress Rock Candy Glitter.  I really love the effect!


Last, I added one of Tim's small talk occasions stickers and his tinsel ribbon.  I hope you like my version, it was really fun to make.  Find all of the supplies at The Funkie Junkie Boutique today and enter this challenge for a chance to win a gift card to the shop.


I'm sharing with:

Nov 19, 2016

Moth to a Flame Fiery Butterfly Card


I'm sharing this flaming and passionate card on the IndigoBlu blog today.  This month we are all working with the theme, Burning Bonfire.


I made this fiery background using Distress Inks.


I stamped the background stamp from the Blooming Great Stamp Set two times with black Versafine ink, then quickly while the ink was still wet poured on gold embossing powder and heat set for a variegated effect.


I computer generated the text.


I stamped the Flutterby Dinkie Stamp onto some inky paper and fussy cut.


I layered some basket filler over a black doily die then mounted my butterfly on top with hot glue.


The final touch was to splash watery Goldfinger Metallic Paint over the panel and attach a loopy bow.


Grab your butterfly stamp today HERE!

I'm also sharing with:

You are invited to the Inlinkz link party!

Click here to enter

Popular Posts