Jan 31, 2018

Tim Holtz Victorian Lady and Embossed Frame Valentine


Happy last day of January dears!  Today we launch a new challenge at Frilly & Funkie and our hostess Zoe has chosen the theme All You Need is Love.  She says, "Create a vintage or shabby chic project with the word "LOVE" somewhere on the project. It can be the focus or just a tiny detail."


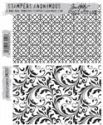
I picked up this gorgeous Victorian Tim Holtz stamp set during the incredible sales after Christmas at the Funkie Junkie Boutique.  If you haven't subscribed to the site newsletter, make sure to scroll to the bottom of the page and submit your email address.  Then you will be the first to know about new products and special promotions.  I had in mind to create a fancy embossed frame for this lovely lady.


To do that, I cut two of the smallest size scalloped borders from the Stitched Ovals set.  I carefully snipped between each scallop, almost to the very edge (from the bottom up).  This gave me the ability to wrap the die around the second largest oval in the set.  I cut it from thin chipboard and used wet glue to adhere the border.  I was thrilled that the ends met up perfectly from two cuts!  I used the embossing dauber to add ink to the edges of the frame, then embossed with a UTEE type of powder.  I watercolored my fancy lady and cut her out with the same sized oval, then snipped the diagonal sections off of the cutout and layered over my frame.


For even more drama, I die cut a Mixed Media thinlet from some paper I inked with Vintage Photo and Festive Berries DI.  I inked the backing panel with just browns so the color would contrast.


Finally, I stitched a faux stitching stamp (BoBunny) and embossed a partial stamping of the flourish stamp from Lattice & Flourish.  I made three wee roses from the Tiny Tattered Florals set and mounted them with a twine bow.  I layered onto Metallic Kraft Core to compliment the various embossing.  What fun!  I hope you are inspired to play along with our current challenge for a chance to win a $25 gift certificate from the Funkie Junkie Boutique.

There you will find these and other exquisite stamp and accessories:


I'm also sharing with:

Jan 30, 2018

Distress Ink and Oxide Techniques with PaperArtsy and Simon Says Stamp


What an incredibly busy holiday season/New Year it has been for me!  Adding our little anniversary adventure and basketball season and well, quite frankly I've been spinning!  :)  I have been so anxious to sit in my studio and make some projects just for fun, with no DT commitment in mind.  The current challenge at Simon Says Stamp was just the prompt I needed, as the embossing resist technique is one of my all time favorites.  I simply cannot get enough of the new PaperArtsy E³ {Scrapcosy} stamp sets.  I've used images from all three sets (ESC010), (ESC011) and (ESC012) as well as stencil 093 and 095 for this nautical / sea inspired tag.


I embossed two of the fishes and did a good dipping of with my watercolor tag in Twisted Citron, Cracked Pistachio and Blueprint Sketch to get the color variations.  I went back in and sponged the same colors for a more vibrant effect.  I used the circles from stencil 095 and spritzed water over the openings, let the water sit for about 30 seconds, then lifted the color with a baby wipe.  This created a beautiful light pattern on my tag.


Next I layered stencil 093 onto my tag and sponged heavily with Blueprint Sketch.  The embossed fish resisted the ink and this made such great depth.


I embossed my stamped Blueprint Sketch octopus with clear EP over a second inky panel, then fussy cut.


I layered him over a Tim Holtz Mixed Media thinlet die, some gauzy cheesecloth and a bundle of thread.  I gave everything a splash of watery gesso.


I used these amazing Verve Stamps dies to make some foliage along the bottom of the tag then mixed Art Stones with Mod Podge and to complete my ocean floor.


I hope you like this tag, made just for fun, for the sheer love of stamping!  :)


Next stop was to play with my Distress Oxides for a quickie make for the current Simon Says Stamp Flickr challenge, Friendship.  The background panel was a mop up from another project using Fossilized Amber DOX.  I stamped the SSS Emma Background stamp in Fired Brick DO over it and spritzed with water both before stamping and after to maximize the oxidization.  I die cut Tim Holtz Friendship dies and layered with Metallic Kraft Core.


I added a few sequins that I won from the sweet Esther of Shoregirl's Creations.  Thanks Esther!  I think I will become addicted to this background stamp too!  It's a 6x6 circle and here I only stamped half of it.  So many alternative uses, including embossing resist.  :)  I'm sure you will be seeing that soon as well.  Thanks for visiting today!


I'm sharing my tag with:

I'm sharing my card with:

Jan 29, 2018

New PaperArtsy Emma Godfrey Door Stamps Mixed Media Cards


Friends, today I am EVER so excited to finally share these samples I made for the PaperArtsy booth at Creativeworld in Frankfurt, Germany with you.  Please hop on over to the PaperArtsy blog where you will find my post as well as the stamp designer Emma Godfrey's post, along with images of the stamp sets.  Now this collection is quite different than Emma's previous releases, but I know you will be just as crazy about each set as I am.  Make sure to contact your local stockist to place your orders.  I've used both PaperArtsy E³ {Emma Godfrey} (EEG025) and (EEG026).  Here's a quick video Leandra shared on her FB page.  EEK!  :)


I've combined stamping with embossing for beautiful resists and contrast.


A few interactive elements and loads of layering with the exquisite tile stamps.


I do hope you will take a moment and look at the full post.  Thanks so much for your support and encouragement.  I am absolutely thrilled to be working with PaperArtsy images.  I have several guest posts coming in the next few months, so please stay tuned for more.  

Behold, I stand at the door and knock; 
if anyone hears My voice and opens the door, 
I will come in to him and will dine with him, 
and he with Me.
Revelation 3:20 NASB

I'm also sharing with:

Jan 27, 2018

Tim Holtz Dark Distress Oxide Background Turorial


Hey guys!  I'm so excited to be sharing a Saturday Step by Step post at Frilly & Funkie today.  I hope you will hop on over and check out this fun Distress Oxide background tutorial.  Here are the birthday and thinking of you cards I created with the technique.  <3


I'm also sharing with:

Jan 25, 2018

GIVEAWAY! Facebook and Instagram Launch at Mini Album Makers Challenge


Friends I have an exciting announcement and fabulous giveaway for you today!  My new challenge blog Mini Album Makers was started with the goal to build community among fellow paper crafters and bookmakers, all under the umbrella of providing quality education and tutorials.  It has taken a few months, but we have finally established a Facebook and Instagram page, with which to advertise your beautiful entries and form new connections in the papercraft world.  I need YOU to make these platforms a success, so that means an exciting giveaway is in order at Mini Album Makers.  One lucky winner will receive a $25 gift certificate to the Funkie Junkie Boutique, where you can order all of the latest releases from Creativation!  The rules can be found on THIS POST.

This challenge ends on February 13 at midnight EST and the winner will be announced on Valentine's Day!  <3

Going forward, when you add your entries into our monthly challenge you will be able to post them to our Facebook page and tag us on Instagram for a repost.  In addition to introducing you to new friends and inspiration, we hope this exciting opportunity will give your beautifully crafted works (and our blog :)) more exposure.  Cheers friends!

Jan 24, 2018

Tim Holtz Butterfly Valentine Burlap 4x4s


My local friends (Hi Madelyn!  Hi Bonnie!  Hi Barbara!  Hi Carol!) and I do a regular tag/art swap.  Each of us purchased Tim's carousel tower clip display to fill them up with our swap art.  I made these burlap 4x4s with the Tim Holtz Small Detailed Butterflies die.


I based my minis on THIS framed collage panel I did in my stint as GD for Simon Says Stamp last January, only on a much smaller scale.  I cut my 4x4 substrates from heavy chipboard then adhered burlap paper over the tops.  The elements are basically the same as described in my first post.


Here are my other projects for our little swaps in case you missed them.  Our next challenge theme is Easter - what fun!  Wish me luck.  

Butterflies & Script Tags posted HERE.

Fall Leaves Tags posted HERE.

Jan 22, 2018

Prima Enchanted Eileen Hull Travelers Journal


Hi friends!  I'm back from a great holiday/anniversary celebration.  I did catch a bug on the tail end of our trip, but am much better now.  Today is my darling daughter Sydney's birthday and I decided to make her a journal because she is a journal addict and has the prettiest handwriting ever!  I can hardly believe she is 17 today!!! 


I've been tinkering with the idea of having a faux leather spine wrap for my Eileen Hull Travelers Journals.  I thought I could make one similar to the mini album HERE with the burlap spine wrap.  Well, I came across this sheet of "handmade" textured/embossed paper and knew it would be perfect.  I paired the champagne colored paper with the new My Prima Planner Enchanted A4 paper pad.


I customized the front by using the label in the Scoreboard die.   I painted it with PaperArtsy Fresco Chalk Paints {Amethyst}.  This color was made for this paper pad!  


I used chunky platinum embossing powder and an old foam alphabet stamp for the embossed monogram.


I attached glitter tape to the inside of my spine just for fun!


I painted the outer spine with the same paint, then cut my spine wrap to size.  NOTE: I strung my elastic cords before covering my spine.  I attached Red Line tape on one side and adhered to the cover, then added another section of tape and attached to the book with the cover CLOSED.  This is important because you need a little give when the book opens.


My goal was simplicity, so not many frills, just one useful journal.  I made three inserts with the designer paper and white copy paper insides.  Below you can see how beautiful and crisp the spine wrap looks.  I cannot wait to make some more of these!  How about you?  Are you making travelers journals or what other gift ideas do you have up your sleeves?


See my other Eileen Hull books HERE.
And don't forget to join our January challenge at Mini Album Makers for a chance to win a $25 gift certificate to Lindy's Stamp Gang.


I'm also sharing with:
(My favorite die is the Eileen Hull travelers journal die
because making these books is the most fun ever!)
(I chose the curvy letter "S")

Popular Posts